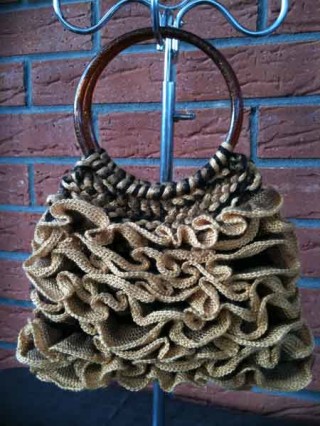
I have recently been experimenting knitting with the wonderful range of ribbon yarns which are generally associated with making scarfs.
Whilst browsing in my local wool shop, I came across a pattern for a Sirdar Salsa Bag, so I bought a ball of the Salsa Ribbon Yarn to have a go.
I am not an experienced knitter so the instructions were not clear for me. I couldn’t remember how to ‘cast on’ properly, wasn’t sure what ‘garter stitch’ was and what did it mean by knit as you would usually for salsa?
So, armed with my size 8mm knitting needle (wooden as it prevents the stitches from sliding too much) my first step was to do a Youtube search for ‘casting on’. I came across this very slow, basic beginner ‘how to cast on’ video which was excellent:
I adjusted the pattern instructions and cast on 16 stitches (not 12) and as for some reason, the first bag I tried didn’t seem wide enough.
Once you have cast on your 16 stitches, using your Salsa Wool as a single thread, it should look something like this:
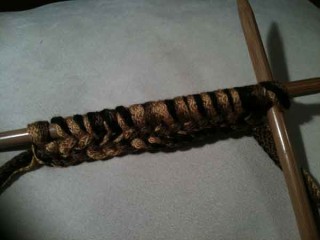
Next, you ‘knit’ 6 rows, taking the yarn around the back of your needle & pulling the stitch through.
(Garter stitch just means ‘knitting’ each row.). You will then have the following:
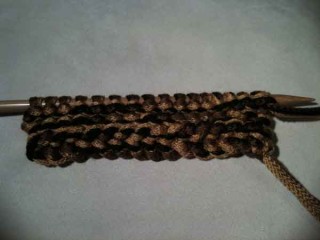
Only now do you open up the ribbon yarn & start to knit into the yarn to create the ruffle effect.
Switch to your smaller needles (I use 5mm).
At this stage, you need to decide which colour you want to prominent. In this case, I went for golden brown, so made sure that I had the dark brown at the top & knitted into that.
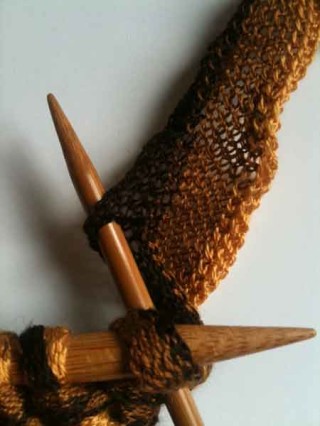
This picture gives an example of how the first ‘ruffle’ row should look.
Leaving approx 1 inch between each stitch, continue until you have knitted approx 25 rows, or you are happy with the size of the bag if you ‘fold’ the completed knitting in half.
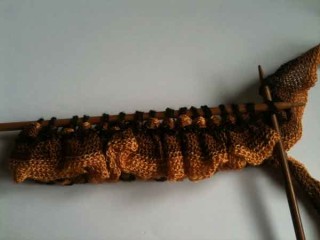
Once you have knitted enough you create the ‘matching top cuff’ by switching back to your 8mm needles and knitting again with the wool as a single thread.
Knit 6 rows & then cast off.
You then finish by sewing the sides together and adding the handles. You also need to consider whether or not you want to add a lining (I feel you should as the yarn is likely to snag easily when you place items inside).
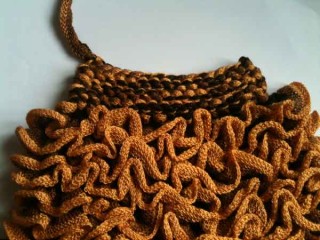
The type of handle you use is entirely down to personal preference. I spotted some plastic circular handles at my local craft store so decided to use these by wrapping the remaining wool tightly around it & then sewing it securely to the final garter stitch row.
The pattern suggests that you do the following for the handles – fold the remaining yarn into 4 strands, twist tightly, fold in half & then stitch into position. (I’ve yet to try this, so cannot offer any finished pictures).
This is my finished Salsa Ribbon Yarn Handbag.
A lot of my finished items are available to purchase in my gift shop.
Happy Crafting !



Leave A Comment
You must be logged in to post a comment.