I enjoy knitting and was recently told about something called a ‘Twiddle Muff’ for Dementia sufferers.
It turns out it is a type of sensory aid designed to provide comfort and stimulation not only to people who have dementia but also those who have anxiety, or other sensory processing disorders.
It is essentially a muff made of soft, textured fabrics and materials, with items such as ribbons, buttons and beads attached to the outside as well as the odd button on the inside too.
The idea is that the person can hold and manipulate the muff and the attached items, which can help to calm and distract them when they are feeling anxious or agitated. The term “twiddle” refers to the act of fiddling or playing with small objects, and the muff provides a safe and contained space for this type of activity.
I am part of a small local craft group, so as we had a suitable stash of wool remnants, we decided to give them a go.
We found a pattern to follow courtesy of Oxford University Hosptials, you can grab it yourself here: https://www.ouh.nhs.uk/patient-guide/documents/twiddle-muffs.pdf
You start by casting on 40 stiches and the follow a knit a row / purl a row sequence (stocking stitch) until you reach approx 11 inches. This part will be the inside of the muff, and is called the ‘cuff’ in the pattern instructions.
As the wool I had was fairly thin, I decided on the double up version, which creates a rather nice pattern.
I forgot to take regular pictures of the same Twiddle Muff, so the progress pictures I share below are of different ones, but hopefully you will get the idea.
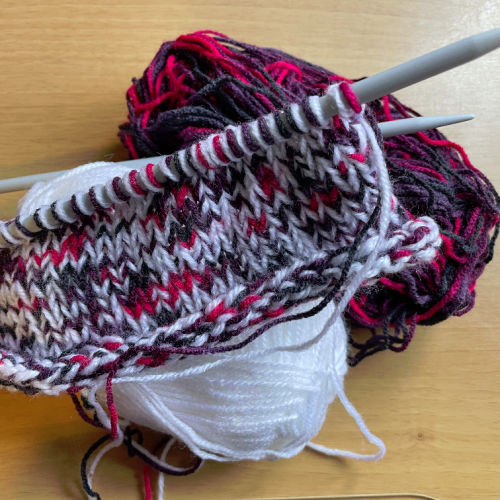

Once you complete the 11 inch section that will form the inside (the cuff), the fun really begins!
You simply use up scraps of wool to create the ‘body’ or as I call it, the outside of the muff. I had a variety of wool which creates lots of different textures, which is perfect.
I especially liked adding the occassional single ruffle yarn rows, using wool left over from my scarf making. The challenge was getting the ruffle on the correct side of the knitting (so it didn’t eventually get hidden on the inside once the muff was made up). The secret is to add it on a purl row!
During this stage, I decided to vary the stitch type as well, often doing several knit rows to create a more ridged effect.
I admit that I like things to be fairly uniform, so I decided to only use full rows, but you don’t have to.
You also don’t have to worry about sewing in any loose ends (as long as they are tidied off securely) as these will eventually get hidden on the inside of the muff.
Once you reach a length of approx 23 inches, you can cast off.
Then, you sew right sides together down the long edge, making sure you move all of the loose ends to the wrong side as you stitch.
This creates your long tube.
Put your hand & arm inside the body part of the tube, until you reach the centre point (where the funky body rows stop). Then, take the far end of the cuff part & fold it back on itself, over your hand so that you have right sides showing on the outside AND inside of the muff (double layer).
This forms your short tube, aka your muff. Sew the cuff and body together at the end, making sure you leave the centre as an opening, so your hands can go in both ends & touch in the middle.
(I will add a video showing this part once I get chance to film it!)
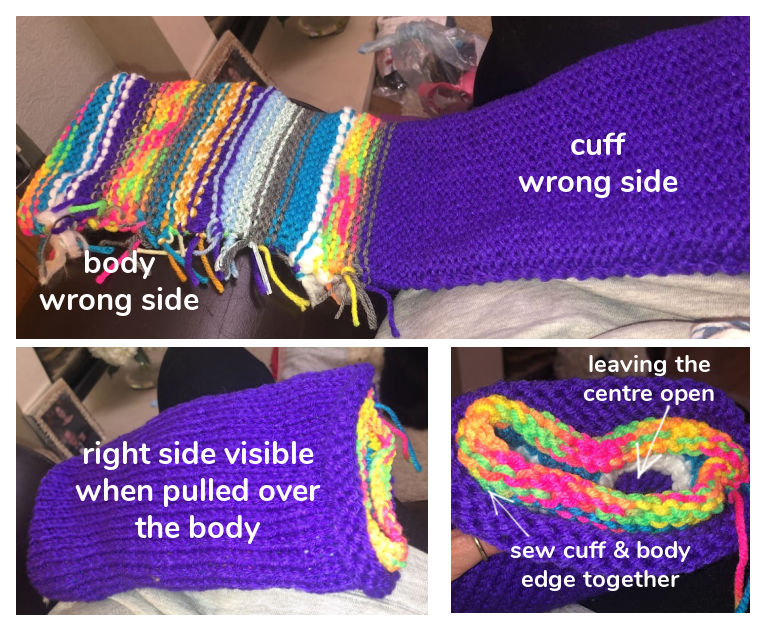
Your Twiddle Muff is now ready for decorating on the outside AND inside – so there is something to twiddle with when your hands are inside.
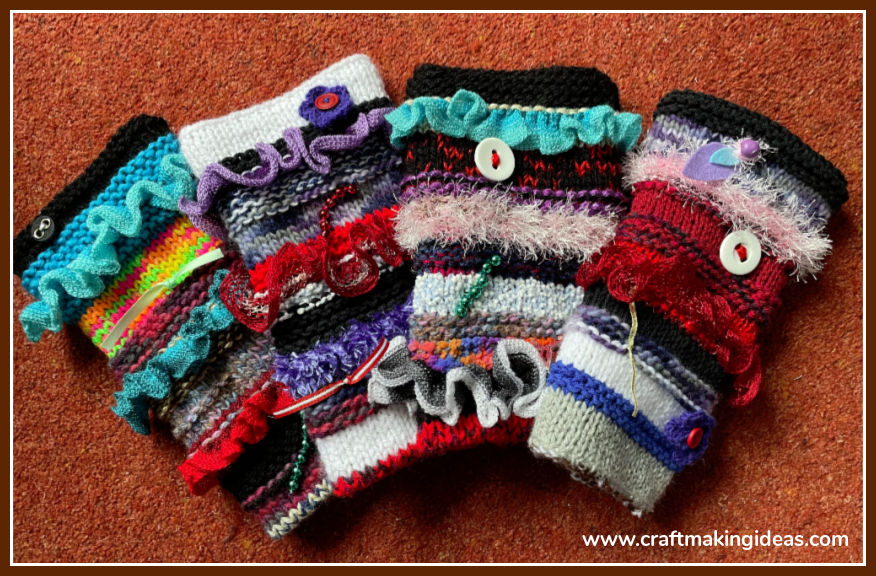
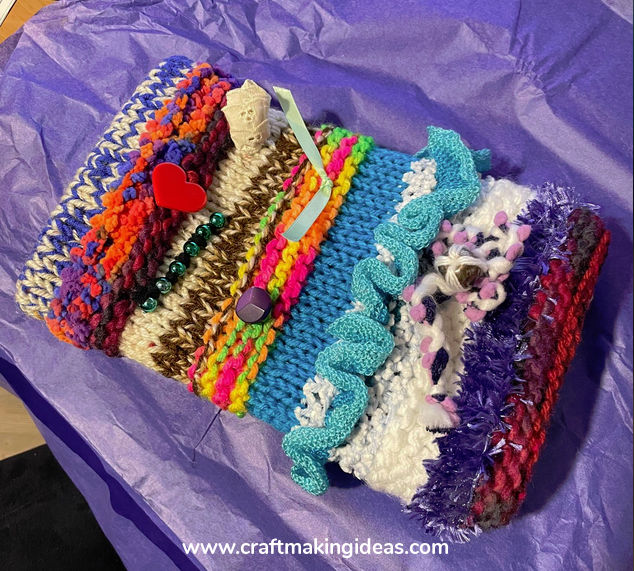
You can add buttons, ribbons, bells, pieces of fabric, felt, beads etc.
Just make sure everything is attached really well and any loose ends are sewn in or clipped off.
At the moment, we have a couple of local nursing homes we will be donating the twiddle muffs to.
If you would like one for a friend or loved one and don’t have the time or inclination to make one yourself, they are also available to buy. They are very afforable as we are just asking enough to cover the cost of the materials, postage and the ability to donate a proportion to charity.




Leave A Comment
You must be logged in to post a comment.